Garbage Disposal Cost: Unit Price vs Installed Price
Garbage disposal cost includes the unit plus installation, with extra work for wiring, drain changes or damaged connections. For a useful budget, get a quote for your exact sink setup and separate required work from optional upgrades.
On this page (9 sections)
- What does garbage disposal cost include?
- Which kitchen setup needs the least installation work?
- Which disposal is worth buying for your household?
- When should you buy drain parts separately?
- Is DIY installation worth the savings?
- How can you compare installation quotes fairly?
- Which common mistakes increase the project cost?
- How can daily use help avoid unnecessary repairs?
- How should you decide what to spend on garbage disposal cost?
Garbage disposal cost includes the unit plus installation, with extra work for wiring, drain changes or damaged connections. The best budget starts with your sink setup, because a simple replacement and a first installation can involve very different work.
Separate the disposal from labor, removal and supplies before comparing quotes. That breakdown shows whether you're paying for a better-suited appliance, necessary repairs or changes your kitchen doesn't need.
If you're still choosing a model, start with our complete garbage disposal buying guide. Here, the focus is choosing the right scope of work and avoiding expenses caused by a poor fit.
What does garbage disposal cost include?
Garbage disposal cost includes the appliance, installation labor and any required connection work. Ask for a complete installed quote before buying, especially if your sink has never had a disposal.
| Budget item | What the estimate should explain |
|---|---|
| Disposal unit | Exact model and whether you or the installer supplies it |
| Removal | Disconnecting the old unit and taking it off the mount |
| Installation | Mounting, drain hookup and dishwasher connection if needed |
| Electrical work | Reusing a suitable connection or adding required wiring, an outlet or a switch |
| Plumbing supplies | Necessary fittings, seals and changes to the drain route |
| Unexpected repairs | How damaged pipes, mounts or sink connections will be handled |
| Finish work | Leak checks, operating checks, cleanup and haul-away |
A bundled quote can still be useful if the installer clearly describes what's included. The problem is an unclear scope that leaves you comparing different jobs.
For example, one estimate might cover a compatible replacement using sound existing connections. Another might include a new sink flange, drain reconstruction and removal of the old appliance.
You don't need a separate charge for every washer to compare those offers. You do need to know which connections will be reused, which will be replaced and what could change the final bill.
How to build a garbage disposal cost worksheet
Use required work as your starting budget, then separate optional upgrades. Write down the unit, installation, necessary parts, electrical changes and haul-away as distinct items.
Mark each item as included, separately quoted or still unknown. Resolve the unknowns before ordering so you don't mistake a partial estimate for a complete project total.
If damaged plumbing might be uncovered, ask how extra work gets approved. A clear process lets you decide before the installer adds repairs beyond the agreed scope.
Which kitchen setup needs the least installation work?
A compatible replacement with sound connections usually needs the fewest changes. A first installation needs closer planning because the drain route, power supply and controls may all require work.
Replacing a similar existing disposal
Check the old model, mounting system and electrical connection first. A matching mount can simplify the swap, but it doesn't confirm that the new drain outlet lines up.
Inspect the flange and nearby pipes for leaks or damage before deciding to reuse them. Keeping a worn connection solely to avoid a small part replacement can create another repair visit.
Changing disposal size or design
A different disposal may change the outlet position or occupy more cabinet space. Measure around the drain, dishwasher hose, shelves and any water filter equipment.
The available height matters, but so does working room beside and below the unit. Leave access to the reset control and service points described in its instructions.
Adding a disposal for the first time
Ask the installer to assess both plumbing and electrical work before you select the appliance. The sink opening, drain height and route to the wall all affect whether the setup will work.
An existing outlet alone doesn't confirm that the electrical arrangement is suitable. Have the connection and switching requirements checked rather than assuming a corded appliance makes the entire job plug-in ready.
Which disposal is worth buying for your household?
Buy for how often you cook and how much food waste you handle, then confirm the model fits your connections. A basic disposal suits light cleanup, while frequent meal preparation gives you more reason to compare stronger models.
The 2 disposals below serve different levels of everyday use. The 2 parts kits later in this guide solve connection problems and should be considered separately from the appliance choice.
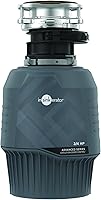
InSinkErator Badger 1 with Power Cord: for light kitchen cleanup
The Badger 1 suits light daily scraps and small batches from a household that mostly puts food waste in the trash or compost. Its 1/3 HP induction motor and single-stage grind make it a basic choice for routine cleanup.
It has galvanized steel grind components and a factory-installed cord. The package also includes a discharge tube, flange, gasket, hardware, stopper and Jam-Buster wrench, so check those supplies before adding separate accessories.
Its Quick Lock mount supports replacement of compatible existing InSinkErator disposals. Lift and Latch technology helps with the sink connection, although you still need to support the appliance safely while fitting it.
Choose it if your disposal is a cleanup aid rather than the main destination for meal-prep waste. InSinkErator backs it with a 1-year limited service warranty.
Skip it for frequent large batches or if you're buying mainly to increase grinding capacity. Also compare other models if reduced noise is a priority, since motor size alone doesn't establish sound control.
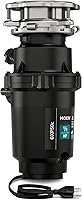
InSinkErator Badger 5 with Power Cord: for regular home cooking
The Badger 5 is the better starting point for regular meal preparation between these 2 models. Its 1/2 HP induction motor gives you a step up in motor power for everyday scraps.
It uses galvanized steel grind components and comes with a factory-installed cord. InSinkErator backs this model with a 3-year in-home service warranty, which gives it another distinction from the Badger 1.
The body measures 6.31 x 6.31 x 11.5 inches. Check the full installation clearances and drain alignment rather than using body dimensions as the only fit check.
Choose it for routine cooking when you want more motor power without moving straight to a larger class. Skip it if you regularly clear heavy loads and want to compare options designed around that pattern.
Our 1/2 HP vs 3/4 HP garbage disposal comparison helps with that next decision. You can also compare other models in our best garbage disposals roundup.
Neither choice turns the sink into a substitute for a trash can. Feeding habits and suitable drain connections still matter when you choose a stronger motor.
When should you buy drain parts separately?
Buy separate drain parts only after identifying a missing, damaged or mismatched connection. The included discharge tube and mounting supplies may already cover a straightforward replacement.
The sink flange seals the disposal at the sink opening, while the discharge elbow connects its outlet to the drain plumbing. A leak at one location doesn't automatically mean you need parts for the other.
PF WaterWorks kit: for a drain layout that needs several parts
The PF WaterWorks Garbage Disposal Installation Kit suits a job that needs several compatible drain pieces, rather than one replacement seal. Its polypropylene components use 1-1/2 in outside-diameter drain tubing.
The kit includes tailpieces, a drain arm, an end outlet tee, an elbow, a trap, washers and a rubber connection boot with an adapter and clamps. That range is useful when planning a drain arrangement with more than one connection to replace.
Skip the full kit if your existing drain is sound and only the appliance needs changing. It also doesn't replace electrical supplies, tools or a check that the fittings suit your sink layout.
Map the disposal outlet, other sink bowl and wall drain before ordering. A collection of fittings cannot solve an unsuitable wall-drain height without further planning.
Mr. Scrappy elbow kit: for a specific outlet repair
The Garbage Disposal Drain Elbow Replacement Kit suits a damaged or leaking compatible outlet assembly. The Mr.
Scrappy set contains a PVC elbow, flange, rubber gasket and 2 screws.
Choose it when the disposal body and surrounding drain remain serviceable and the repair is limited to that joint. Confirm the outlet attachment, connection sizes and elbow shape before ordering.
Skip it for a leaking disposal body, a sink-flange leak or a drain layout needing several new pipe sections. It addresses a particular connection rather than the whole installation.
Is DIY installation worth the savings?
DIY can save labor when the existing setup matches and you can complete the work safely. Include supplies, tools, your time and the possibility of needing help partway through.
A disposal can be awkward to support in a cramped cabinet. Plan how you'll hold it during removal and mounting without pulling on the drainpipe or wiring.
Read our step-by-step garbage disposal installation guide before deciding. Use the appliance instructions for the exact mounting, sealing and electrical steps.
A suitable DIY job has sound existing connections, clear instructions and no changes beyond your skills. Hire help for damaged plumbing, uncertain drain geometry or electrical changes you aren't qualified to perform.
Disconnect power before working and confirm the appliance cannot start. Never put your hand inside the disposal, including when it appears jammed.
If connecting a dishwasher, follow the instructions for its inlet and any knockout plug. Missing that step can leave the dishwasher unable to drain correctly.
Once assembled, check the sink seal and every drain joint while water flows and drains from a filled sink. Recheck after operating the disposal according to its instructions, keeping your hands clear of moving parts.
How can you compare installation quotes fairly?
Compare the same appliance and the same work, then look at the total. A lower headline figure is useful only when it covers the work your kitchen needs.
Give each installer the old model number, the new model you're considering and clear photos of the cabinet. Include the wall drain, dishwasher hose and power connection so the main constraints are visible.
Ask these questions before booking:
- Is the exact disposal model included, or am I supplying it?
- Does the quote cover removal, installation and haul-away?
- Which mounting parts and drain connections will be reused?
- Are dishwasher reconnection and necessary supplies included?
- Does electrical work need a separate electrician or estimate?
- What requires an additional charge, and who approves it?
- Are leak checks and an operating check included?
- Who handles a return visit if an installation joint leaks?
If you supply the appliance, ask how a defective unit would be handled. The installer may treat appliance replacement and installation labor as separate matters.
A manufacturer warranty and an installer's workmanship terms also cover different responsibilities. Read both rather than assuming the appliance warranty pays for every future service visit.
For an existing unit, review what to check before replacing a garbage disposal. A clear fault description helps you request the right job.
Which common mistakes increase the project cost?
The most avoidable expenses come from buying before checking fit or replacing the wrong part. A few checks can prevent unused supplies and repeat visits.
Ordering by horsepower alone
Motor power helps narrow your choices, but it doesn't tell you the mounting fit, outlet location or cabinet clearance. Check those details before committing to a model.
Also consider how you use the sink. Paying for extra grinding capacity has less value if you only rinse away occasional small scraps.
Buying duplicate accessories
Check the included components before adding a cord, discharge tube or installation kit. Both disposals covered here already include cords and several installation supplies.
Have the installer identify anything else needed for your particular layout. Buy around those gaps rather than treating every accessory as necessary.
Assuming a stronger motor fixes slow drainage
A disposal cannot correct a blocked or poorly arranged downstream drain. If both sink bowls drain slowly or water backs up elsewhere, have the drain problem assessed.
Replacing the appliance first can leave you paying for a new disposal and the original plumbing repair. Diagnose where the restriction occurs before choosing the work.
Replacing a unit for a connection leak
Find the leak's source with power disconnected before deciding on replacement. Water at a drain joint can call for a seal or fitting repair rather than a new appliance.
Water coming through the disposal housing needs a different assessment. Don't assume tightening the nearby elbow will address an internal leak.
Overlooking a jam or overload shutdown
A stopped disposal may need a model-specific jam-clearing or reset procedure. Follow its instructions and avoid repeatedly switching on a unit that only hums.
Our garbage disposal reset button guide explains the overload control. The garbage disposal humming troubleshooting guide covers steps for a common symptom.
How can daily use help avoid unnecessary repairs?
Use the disposal for small, suitable scraps with cold running water, following its instructions. Feed gradually instead of packing the chamber and switching it on under a full load.
Scrape large leftovers into the trash or compost first. Keep grease, oil, fibrous bundles, large bones and nonfood objects out of the drain.
Let the grinding finish, then continue running water as directed by the manufacturer. Water carries particles onward, but it doesn't make unsuitable food waste safe for the plumbing.
Don't force a sluggish unit by pushing more food into it. Stop, disconnect power and follow the troubleshooting procedure if it jams or makes an unusual sound.
Clean the accessible splash guard and chamber using the method allowed for your model. Our garbage disposal cleaning guide explains routine care without reaching into the appliance.
Check the cabinet for drips after installation and during routine cleaning. Finding a small connection leak early can limit damage to the cabinet below.
How should you decide what to spend on garbage disposal cost?
Base your garbage disposal cost decision on the fault, your cooking habits and the required installation work. Buy the appliance and services that address those needs.
- Choose the Badger 1 for light scraps and modest use when its connections fit your kitchen.
- Choose the Badger 5 for regular home cooking when you want the stronger motor of these 2 choices.
- Choose the PF WaterWorks kit when several compatible drain components need replacement.
- Choose the Mr. Scrappy elbow kit when the repair is limited to a matching outlet assembly.
For a working unit with a repairable connection leak, price that repair first. For a failed unit, compare complete replacement quotes rather than the appliance alone.
If you're still choosing the model, use our garbage disposal buying guide to narrow the requirements. Then check the best garbage disposals roundup with your cabinet measurements and installation scope in hand.
Frequently asked questions
How much does it cost to install a garbage disposal?
Garbage disposal installation cost depends on the unit, labor and the condition of the existing connections. A compatible replacement generally needs less work than a first installation.
Ask for an itemized quote covering removal, mounting, drain connections, electrical work, supplies and haul-away before setting your budget.
Is it cheaper to install a garbage disposal yourself?
DIY installation can save the labor charge when you can safely handle the unit and connect it to compatible existing plumbing and power. Include tools, supplies and your time in the comparison.
Hire help for electrical changes, damaged fittings or a drain layout you cannot connect correctly.
What makes garbage disposal installation cost more?
New electrical connections, drain changes, damaged mounting parts and difficult access can add work to an installation. A first disposal may also need a switch and a suitable power connection.
Ask which tasks are included, which need another trade and how the installer handles unexpected repairs.
Do garbage disposals come with a power cord?
Some disposals include a power cord, while others require a separate cord or an approved hardwired connection. Both Badger models covered here have factory-installed cords.
Check your existing power setup before ordering, since a cord does not supply the outlet, switch or electrical work your kitchen may need.
Should I replace a garbage disposal or repair it?
Repair may make sense for a jam, tripped overload protector or leaking drain connection, while a leaking disposal body can point toward replacement. Disconnect power before inspection and follow the model's instructions.
Compare the specific repair needed with a replacement quote that includes installation, rather than the unit alone.